
Jira has always been a very empowering tool when it comes to managing agile-based projects. JIRA scrum board is one of the best features which the Jira tool provides. In this article, we will be talking all about the JIRA scrum board, particularly:
- What is Jira Scrum Board.
- Jira Scrum Board Example.
- Jira Scrum Board Permissions.
- Jira Scrum Board Configurations.
- How to add columns in Jira Scrum Board.
- How to rename a Jira Scrum Board.
What is Jira Scrum Board? #
Jira Scrum Board is a tool that helps the team to visualize the lifecycle of issues in a scrum. It is a virtual space where the team can see the entire scope of the sprint.
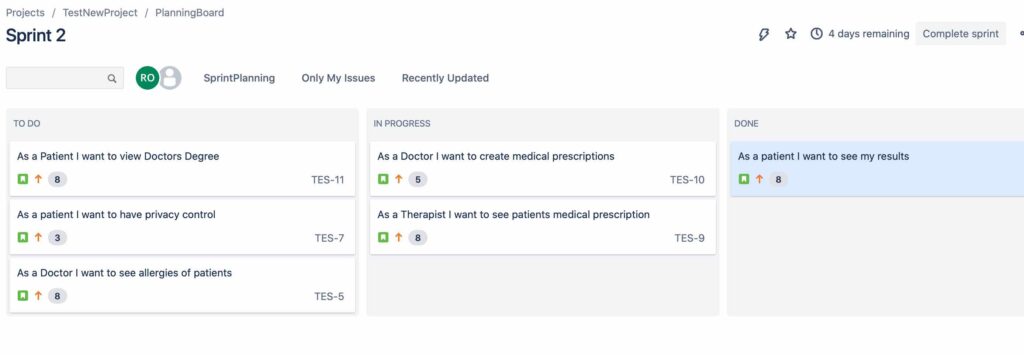
figure 1.1
The three main objects that JIRA Scrum Board fulfills:
- Improve the Communication and have Clarity: All the scrum team members have access to JIRA Scrum Board. Anyone can view anytime what stories are at what state, along with who is working on what. The team gets a clear picture of what is complete and what you still need to work on.
- Assists in planning : The scrum team works in a time-boxed interval, and hence looking onto the scrum board helps the team plan and manage if some action needs to be taken on the tasks that are not likely to get completed.
- Improve focus among team and organization : Big pieces of work are sliced into stages, and the way the work gets aligned and represented in the jira scrum board helps the team understand the scope and what is next in the pipeline. This visualization, along with other tools based on JIRA Scrum Board like burndown charts and velocity charts, helps the team and organization maintain their focus on what is required at the moment.
JIRA Scrum Board makes the lifecycle of scrum much easier to work with as it is much convenient for the team to look into tasks, assignments, pending work, statuses. JIRA Scrum Board is much more than just a scrum board. It increases team collaboration and visualization of the scrum’s progress and promotes incremental delivery.
PRO TIP : Working of Burndown chart and Velocity chart depend on how the scrum board has been set up for your project in JIRA.
JIRA SCRUM BOARD EXAMPLE #
This section lets us look into one of the boards where a few things have been configured custom for a team.
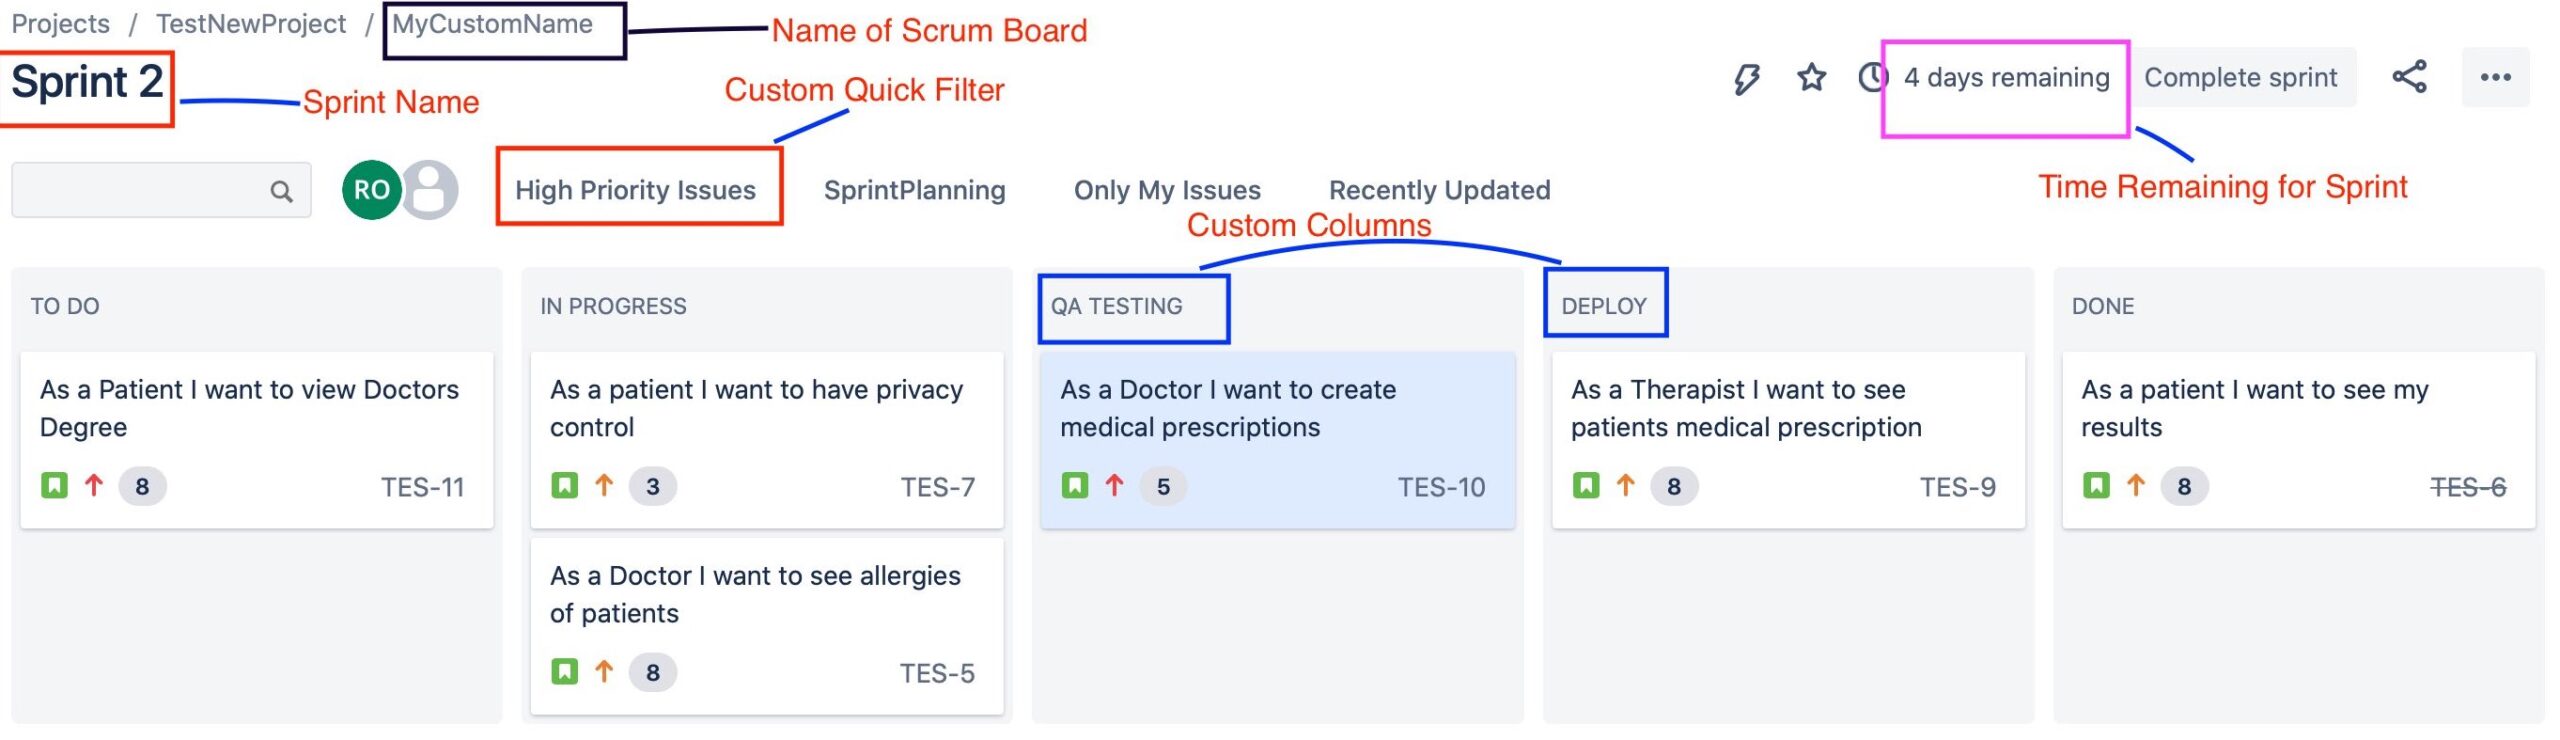
figure 1.2
The figure shows an elementary and standard scrum board with five columns to map our workflow’s different statuses.
- To Do
- In Progress
- QA Testing
- Deploy
- Done
QA TESTING and DEPLOY have been added as new custom columns.
Two quick filters are added to all scrum boards by default(Only My Issues, Recently Updated). We can always add new filters to our scrum board by configuring settings and creating new filters. In figure 1.2, custom quick filters High Priority Issues, SprintPlanning has been added. If we click on the filter High Priority Issues, we will get only the issues with high priority.
We can see that board shows how much time is pending for the scrum to end its duration on the top right (Labelled in figure 1.2).
The Sprint Name and Board Name can also be found on top left of the board (labelled in figure 1.2)
There is a lot of other information that we can customize and view in the jira scrum board.
JIRA SCRUM BOARD PERMISSIONS #
Permissions as we all know are the specific settings which can be enabled or disabled to allow the user to do a certain act in an application or view something in it. Similarly, jira has certain set of permissions which are there to define and limit the actions of the users based on them for example if the users can create new projects or the users can see a specific type of comments etc.
Jira has specific Board permissions which can be divided into two parts — board administration permissions and board usage permissions.
Board administration permissions enables to configure the board like adding columns or adding new quick filters.
Board usage permissions enables the users to use the board. For example, creating sprints. Board usage permissions are derived from project permissions.
In the next section, we will discuss jira scrum board configurations.
Jira Scrum Board Configuration #
We can do a lot of configurations depending on our scrum team needs and our convenience. While JIRA offers us a wide range of configuration options, we will talk through a few in detail.
Configuring the Jira Scrum Board allows you to:
- Edit the mapping of the statuses of our workflow to the scrum board.
- Edit the columns.
- Adjust the swimlanes.
- Add new quick filters to the scrum board.
- Customize the card fields and colors.
- Customize the displayed issue fields.
- Customize the estimation technique.
- Customize the time zone and standard working days.
To configure the JIRA Scrum Board, navigate as mentioned below
STEP1: Click the three dots displayed at the extreme right of your jira application screen. (highlighted in figure 1.3)
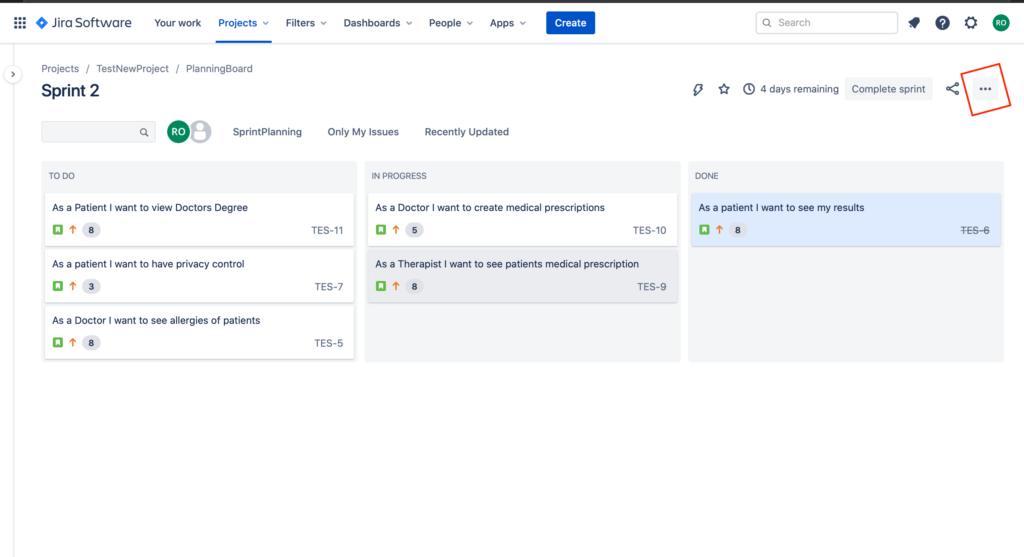
figure 1.3
STEP 2 : Select the option Board settings from the menu.
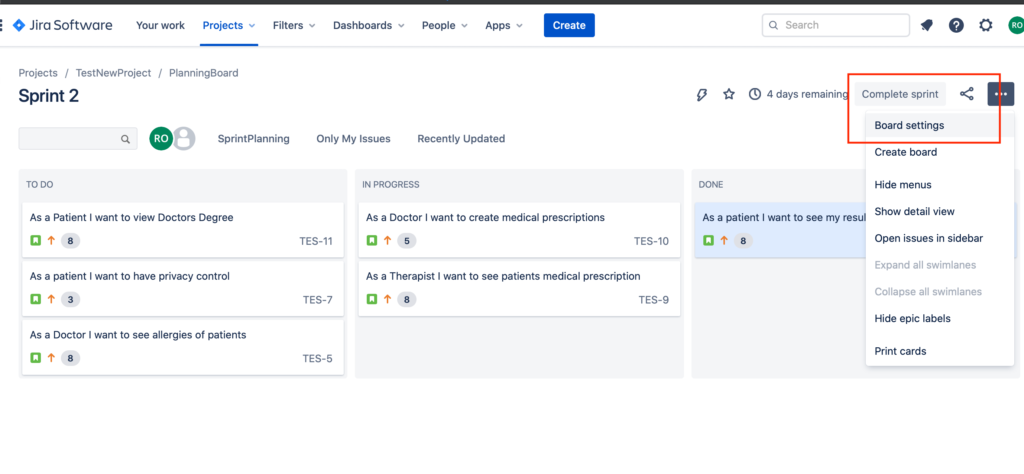
figure 1.4
STEP 3: The extreme left of your screen provides a SETTINGS menu for configuring different features.
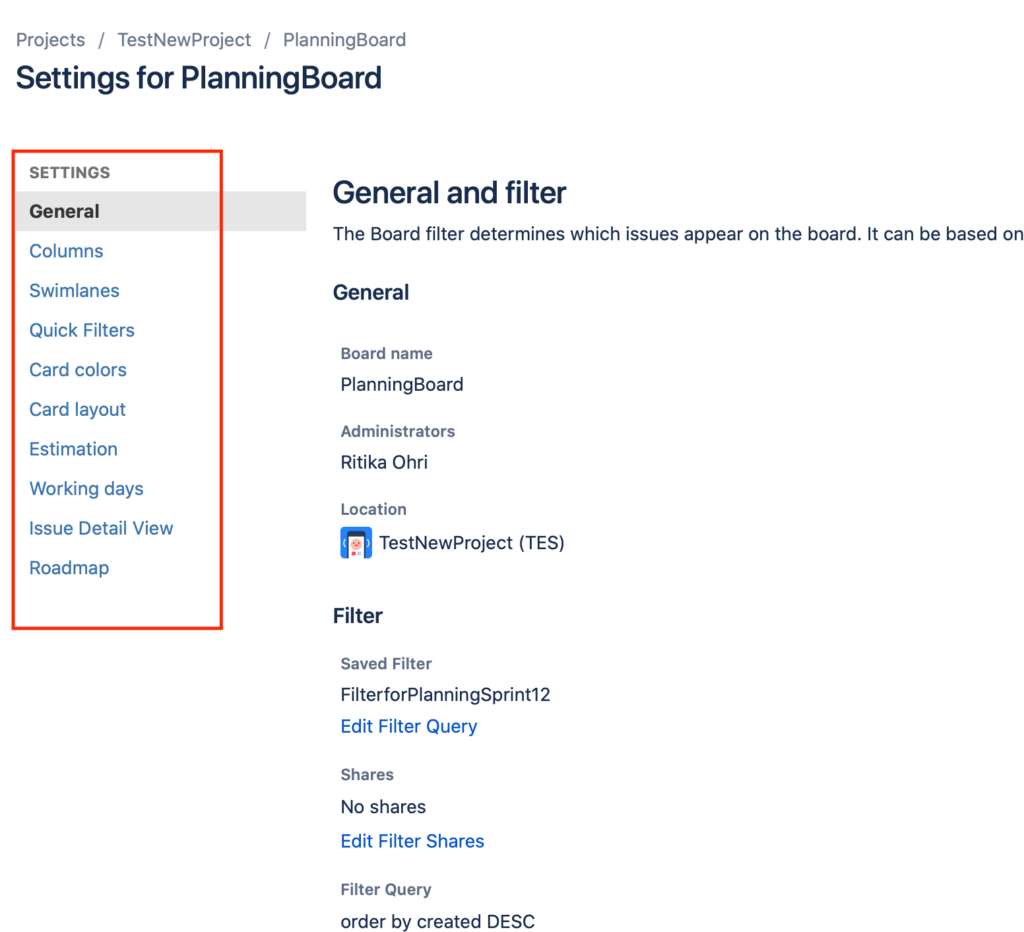
figure 1.5
The below two sections demonstrate examples to customize the board.
How to add the columns in Jira Scrum Board ? #
At times, we need to add some more columns than the default ones to manage with even more ease. Follow along on how to do the same.
Step1 : Go to the Settings Menu (see steps 1 to 3 in above section)
Step2 : Click the option Column from the SETTINGS menu
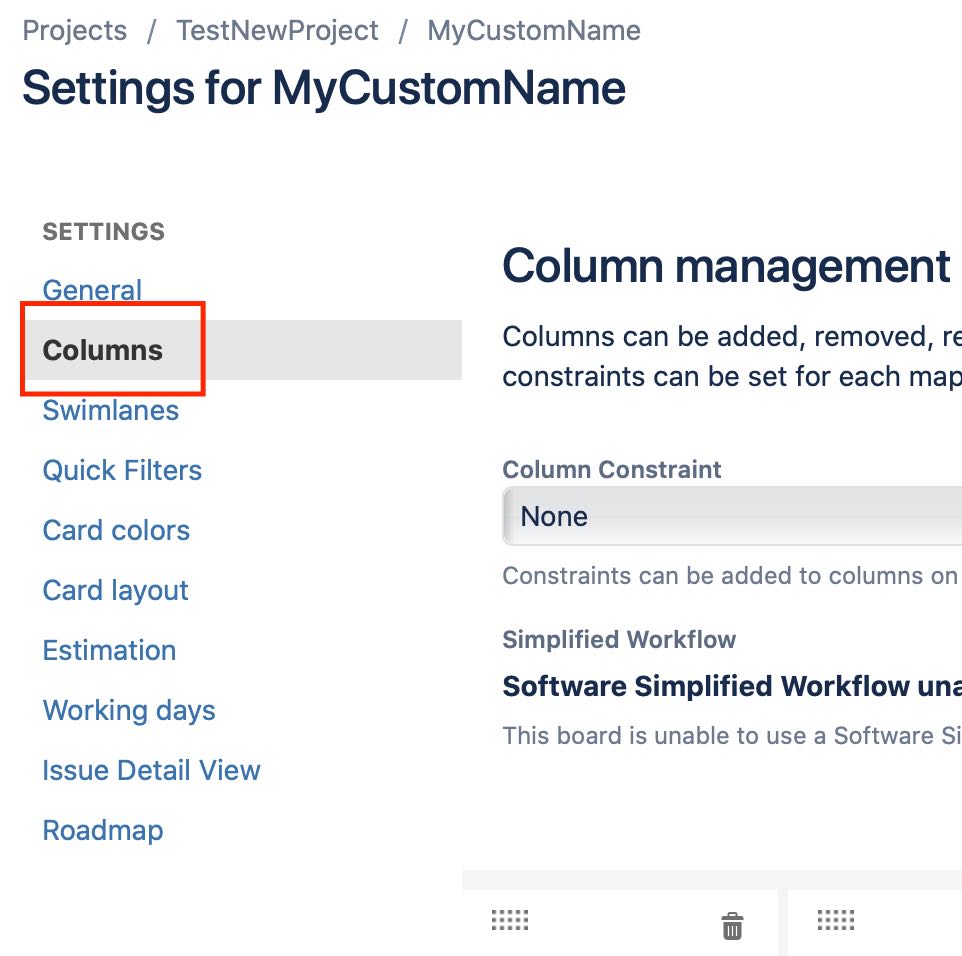
figure 1.6
Step3 : Click the Add column button.
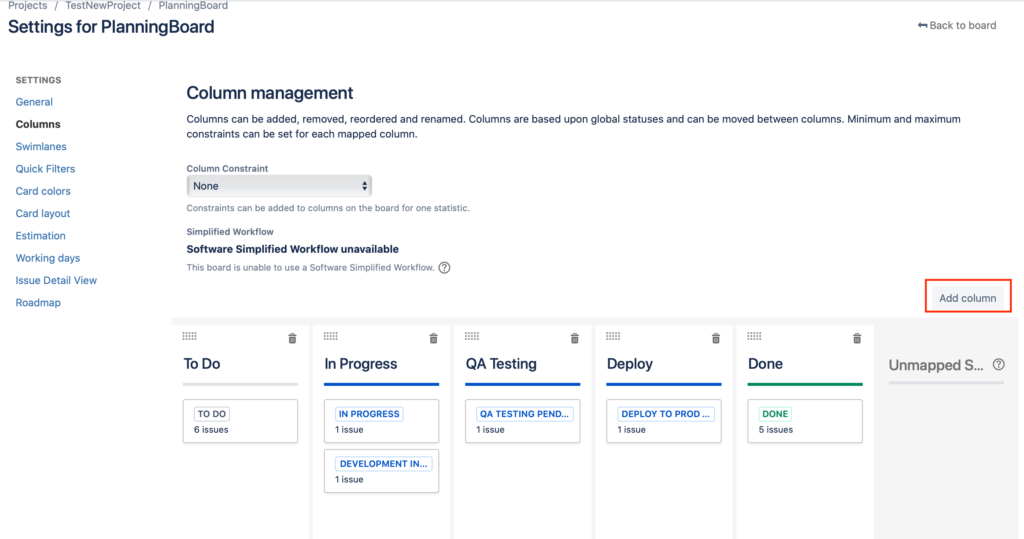
figure 1.7
Step4 : Add the name to your new column on the board (for exampleReady for Delivery in figure 1.8)
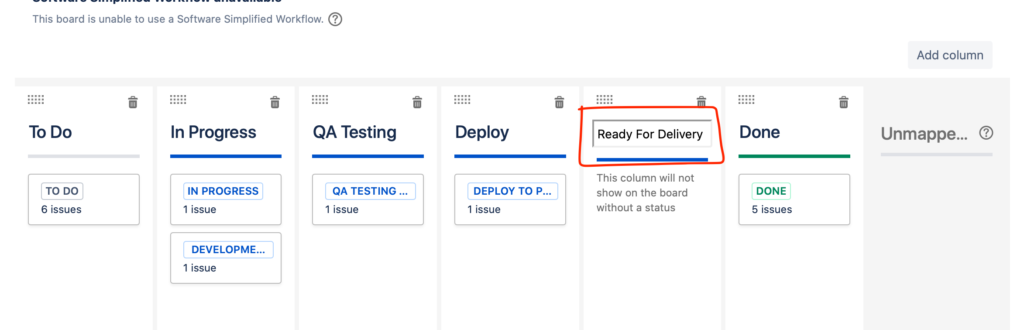
figure 1.8
Step5 : You can change the position of your new column by drag and drop.
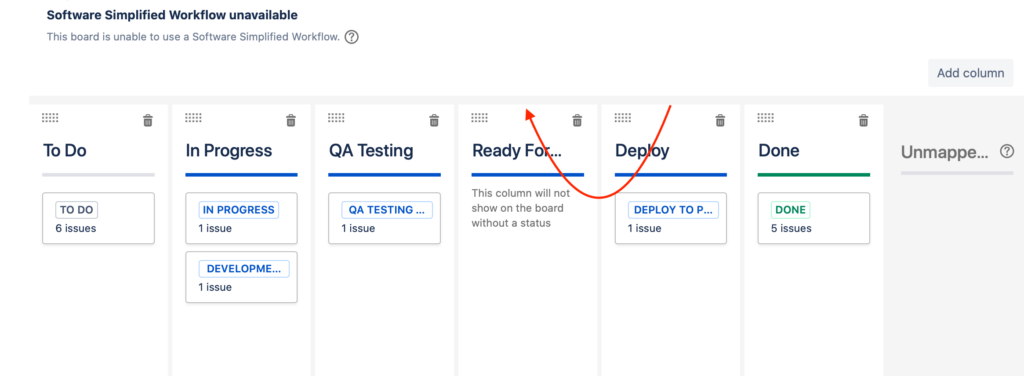
figure 1.9
How to rename the Scrum Board in Jira #
To rename the scrum board in jira:
Step1 : Go to the Board Settings menu (see the above section steps 1 to 3)
Step2 : Click the General menu option.
Step3 : Go to the field -> Board name, and change the name to the name of your choice.
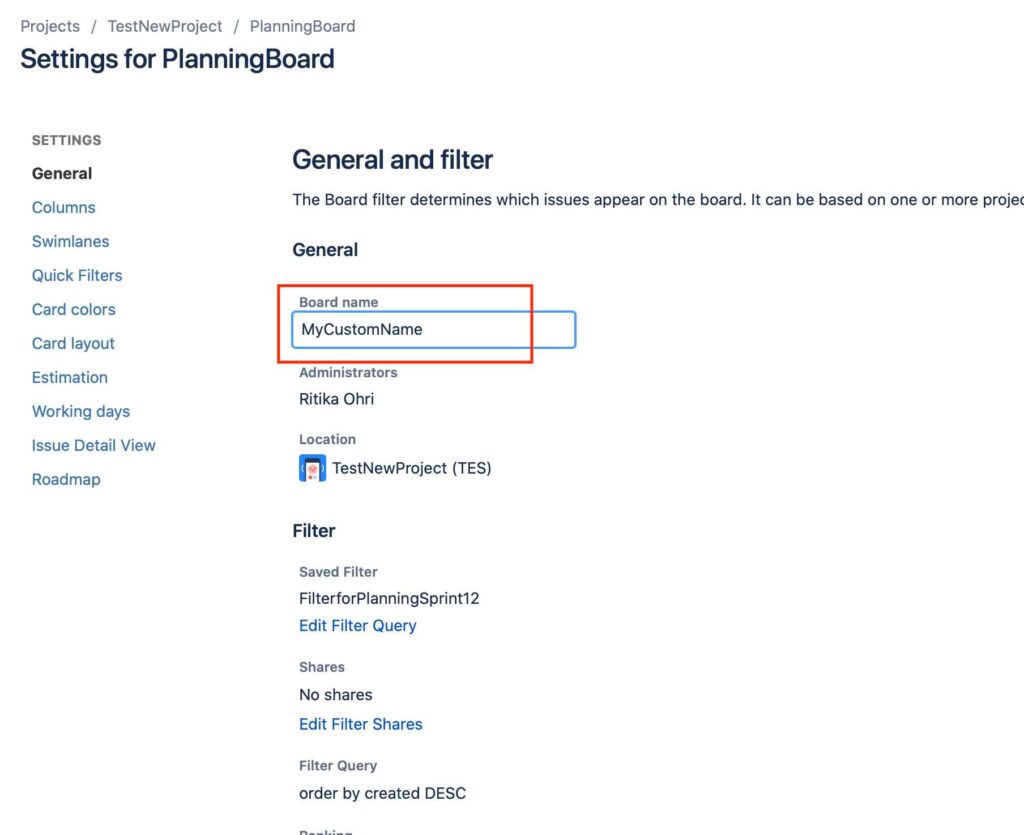
figure 1.10
We hope this article helped you to build a good understanding on Jira scrum board. Good luck !!!